Everyone loves a good party, but what makes a celebration truly unforgettable? Delicious food! At the heart of any successful gathering lies a show-stopping dish, and there’s nothing quite as tantalizing as party ribs. Whether you’re hosting a casual backyard barbecue or a festive indoor feast, learning how to prepare ribs that are tender, juicy, and packed with flavor is an art worth mastering. This comprehensive guide will walk you through every step of crafting the perfect party ribs recipe, from preparation to serving suggestions. Let’s get started!
What Are Party Ribs?
When someone mentions party ribs, it instantly conjures images of succulent, fall-off-the-bone meat that’s glazed with a flavorful sauce. But what exactly makes ribs perfect for a party? Simply put, it’s all about the presentation, ease of serving, and crowd-pleasing taste. Party ribs are trimmed, seasoned, and cooked to ensure they’re not only visually appealing but also convenient to enjoy in a group setting.
Why Party Ribs Are a Popular Choice for Gatherings
Ribs are versatile—they pair beautifully with a range of sides and suit many cooking methods, from grilling to smoking. Their rich, smoky flavor combined with the sticky sweetness of a glaze makes them irresistible. Plus, ribs are shareable, making them the perfect communal dish.
Different Types of Ribs for Every Occasion
Choosing the right type of ribs is essential. Common options include:
- Baby Back Ribs: Smaller, leaner, and quicker to cook, making them ideal for shorter gatherings.
- Spare Ribs: Larger, meatier, and perfect for slow-cooking or smoking to achieve maximum tenderness.
- Country-Style Ribs: These contain more meat than bone, ideal for those who prefer more bite in every piece.
History and Popularity of Party Ribs
Ribs rose to party-staple status through rich barbecue traditions that evolved across the globe. For example, pitmasters in Texas perfected smoky ribs recipes that highlight deep, bold flavors. Meanwhile, chefs in Kansas City developed tangy, sauce-drenched versions that delight crowds with their sweet and savory balance. Throughout many cultures, the process of preparing ribs reflects more than just cooking—it brings people together to share stories, laughter, and unforgettable meals.
Ribs in Global Cuisine
- American Barbecue: Known for its smoky, sweet, and savory flavors.
- Asian-Style Ribs: Often glazed with soy-based sauces and infused with ginger or garlic.
- Caribbean Ribs: Spiced with jerk seasoning for a kick of heat.
2 : Preparing the Ribs
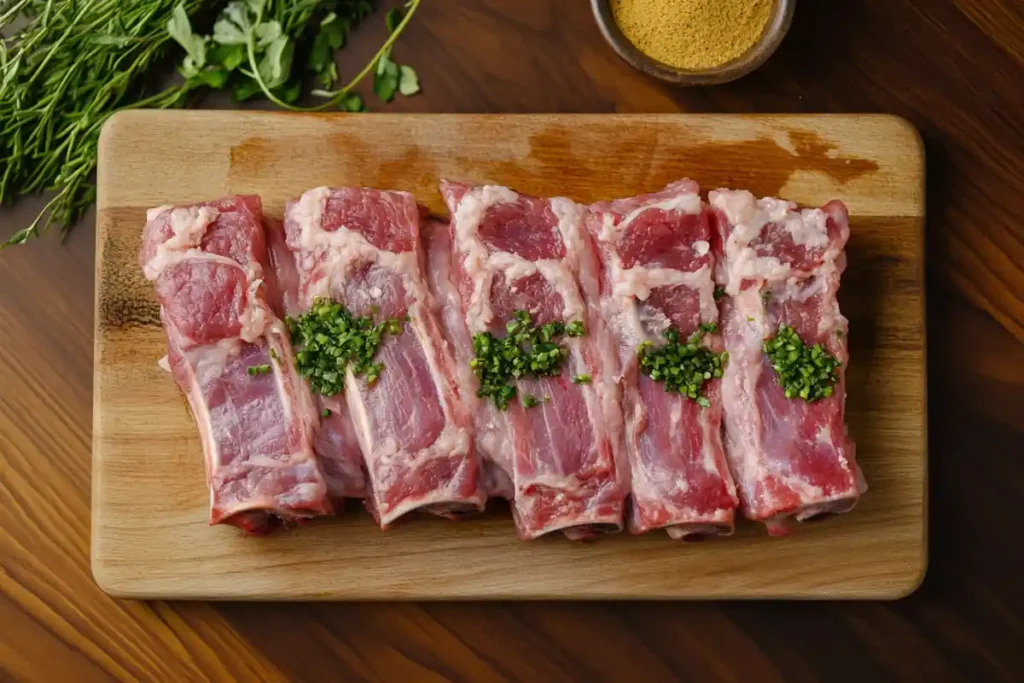
When it comes to crafting the perfect party ribs recipe, preparation is the cornerstone of success. Choosing the right cut, removing the membrane, and slicing the ribs properly are all essential steps that can elevate your ribs from ordinary to extraordinary. Here’s a step-by-step guide to ensure your ribs turn out perfectly every time.

Choosing the Right Cut of Ribs
Selecting the best cut of ribs can feel overwhelming, especially with so many options. Each type has unique qualities suited for different occasions:
- Baby Back Ribs: These are leaner and smaller, making them ideal for quick cooking and gatherings where finger foods are preferred. Their curved shape also adds to their visual appeal.
- Spare Ribs: Larger and meatier, spare ribs are perfect for slow-cooking methods like smoking. They’re packed with flavor and a bit fattier, resulting in a richer taste.
- Country-Style Ribs: These are more meat than bone, offering a hearty option for guests who want something substantial. Though technically not true ribs, they’re still a crowd-pleaser.
For beginners, baby back ribs are a great starting point as they’re easier to handle and cook more quickly.
Removing the Membrane for Tenderness
If you’ve ever bitten into a rib that felt chewy, chances are the membrane was still intact. This thin, silvery skin on the bone side of the ribs acts as a barrier, preventing seasoning from penetrating fully and toughening during cooking. Removing it is key to tender, flavorful ribs.
How to Remove the Membrane:
- Lay the ribs bone-side up on a cutting board.
- Using a knife, gently slide the tip under the edge of the membrane.
- Once you’ve lifted a corner, grab it with a paper towel for better grip.
- Pull the membrane off in one smooth motion. If it tears, simply repeat the process until all of it is removed.
Pro Tip: Don’t skip this step! While it might seem tedious, it makes a huge difference in texture and flavor absorption.
Slicing Ribs for Convenience
Once cooked, ribs can be a bit tricky to serve neatly, especially in a party setting. Pre-slicing them before marination can make them easier to handle and ensures even cooking.
Steps for Slicing Ribs:
- Place the ribs meat-side down on the cutting board.
- Use a sharp knife to cut between each bone, ensuring you get equal portions.
- For thicker ribs, consider halving them again for bite-sized pieces.
Pre-sliced ribs are not only easier to serve but also allow marinades to coat each piece thoroughly, resulting in a more flavorful bite.
Practical Tips for Beginners
- Start Fresh: Always choose high-quality, fresh ribs for the best results. Frozen ribs work too but ensure they’re fully thawed before preparation.
- Sharpen Your Tools: A sharp knife makes membrane removal and slicing effortless.
- Keep It Clean: Use a clean surface and sanitize your tools to maintain food safety.
Taking the time to prepare your ribs properly ensures they’ll cook evenly and taste phenomenal. Next, let’s explore the art of seasoning and marination to make those ribs irresistible.
3 : Seasoning and Marination
If preparation is the foundation, then seasoning and marination are the heart and soul of a great party ribs recipe. This is where you infuse the ribs with layers of flavor that excite the palate. With the right rub, marinade, and a little patience, your ribs can go from good to downright sensational.
Crafting the Perfect Dry Rub
A good dry rub is essential for building flavor before cooking. It forms the base layer that combines with the smoke and glaze to create the signature taste of perfectly cooked ribs.
Key Ingredients for a Balanced Rub:
- Sweetness: Brown sugar or honey powder to caramelize during cooking.
- Salt: Enhances the natural flavors of the meat.
- Heat: Paprika, cayenne pepper, or chili powder for a spicy kick.
- Earthiness: Garlic powder, onion powder, and ground cumin for depth.
- Aromatic Notes: Smoked paprika or ground mustard for complexity.
Combine these ingredients in a bowl, adjusting ratios based on your preference. The mix should balance sweet, savory, and spicy notes harmoniously.
How to Apply the Rub Evenly
- Pat the ribs dry with paper towels to help the rub adhere.
- Sprinkle the rub generously over both sides of the ribs.
- Use your hands to press the rub into the meat, ensuring every crevice is coated.
Pro Tip: Avoid rubbing too hard, as it can clump or fall off during cooking. The goal is an even layer that stays put.
Marinating for Deeper Flavors
While a dry rub adds immediate flavor, marination takes it to the next level. A marinade not only enhances taste but also tenderizes the meat.
Simple Marinade Recipe:
- 1 cup of your favorite barbecue sauce
- ½ cup apple cider vinegar
- ¼ cup olive oil
- 2 cloves minced garlic
- 1 tablespoon Worcestershire sauce
Mix the ingredients in a bowl and place the ribs in a resealable plastic bag. Pour the marinade over the ribs, seal the bag, and refrigerate for at least 4 hours or overnight.
Timing and Techniques
- Quick Marinade: 2–4 hours for lighter flavor.
- Deep Marinade: Overnight for a robust taste.
Rotate the ribs occasionally to ensure even absorption.
Common Mistakes to Avoid
- Overseasoning: Too much rub can overpower the natural taste of the ribs.
- Skipping Rest Time: Allow the ribs to rest after marination for better flavor distribution.
- Using Wet Ribs: Pat them dry before applying rubs or marinades to prevent dilution.
Seasoning and marination are what make each bite of your ribs unforgettable. With your ribs prepared and flavored, you’re now ready to explore the next step: smoking the ribs to perfection.
4 : Smoking the Ribs
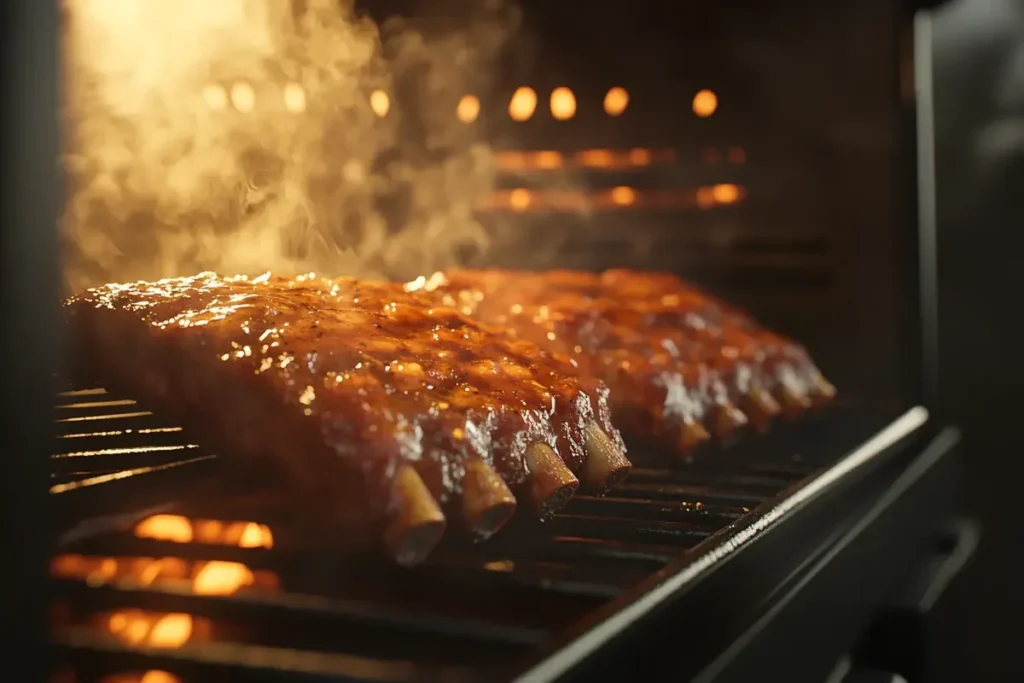
Smoking ribs is an art that brings out deep, smoky flavors while tenderizing the meat to perfection. While it may seem intimidating at first, following these step-by-step instructions will make it manageable and rewarding. With the right setup, wood chips, and timing, you’ll be on your way to mastering the party ribs recipe.

Setting Up Your Smoker
A smoker is the heart of the process, and setting it up correctly is crucial. Start by choosing between charcoal, electric, or pellet smokers based on your preference. Here’s a general setup process:
- Prepare the Heat Source: Fill your smoker’s charcoal chamber or pellet hopper. For electric smokers, preheat to the recommended temperature.
- Add Water to the Pan: If your smoker has a water pan, fill it with water, apple cider, or a juice blend to keep the ribs moist during cooking.
- Position the Grates: Ensure the grates are clean and positioned for even heat distribution.
Choosing the Right Wood Chips
The type of wood chips you select will significantly influence the flavor of your ribs.
- Hickory: A classic choice for a strong, smoky flavor.
- Apple: Adds a sweet, mild aroma, great for complementing the glaze.
- Cherry: Provides a rich, fruity undertone with a reddish hue.
- Oak: Balanced and versatile for a range of meats.
Soak the wood chips in water for 30 minutes before use to produce steady smoke.
Maintaining Optimal Temperature and Smoke Levels
Consistency is key to achieving tender ribs. Aim to maintain the smoker temperature at around 225–250°F (107–121°C). Use a built-in thermometer or an external one for accuracy.
Tips for Maintaining Smoke Levels:
- Add a handful of soaked wood chips every 30–60 minutes.
- Avoid over-smoking; too much can make the ribs bitter.
- Keep the smoker closed as much as possible to retain heat and smoke.
The Smoking Process: Step by Step
- Preheat the Smoker: Bring it to the target temperature before placing the ribs inside.
- Place the Ribs: Position the ribs bone-side down on the grates to allow even cooking.
- Monitor Every Hour: Check the smoke levels and add wood chips or adjust the vents as needed.
- Cook for 3–4 Hours: During this time, the ribs will absorb the smoky flavor and start to tenderize.
Timeline and Indicators for Perfect Smoking
- 3 Hours In: The ribs should develop a mahogany-colored bark.
- 4–5 Hours In: Use a meat thermometer to check if the internal temperature is around 190°F (88°C).
- Final Stage: When the meat begins to pull back from the bone by about ¼ inch, the ribs are ready.
Troubleshooting Common Smoking Issues
- Temperature Fluctuations: Use windbreaks or reposition your smoker to maintain consistent heat.
- Bitter Taste: Reduce the amount of wood chips if the ribs taste overly smoky.
- Dry Meat: Add a spritzing step with apple cider vinegar or juice every hour to keep the ribs moist.
Smoking adds a distinct, mouthwatering flavor to your party ribs recipe. Next, let’s enhance the juiciness even further with the Texas Crutch technique.
5: The Texas Crutch Method for Juicy and Tender Ribs
The Texas Crutch method stands out as a game-changer for achieving moist, tender ribs in any party ribs recipe. By wrapping the ribs during cooking, this technique locks in moisture, enhances flavor, and speeds up the process. Let’s dive into how to master this method and ensure your ribs are a crowd-pleaser.
Why Use the Texas Crutch for Smoked Ribs?
The Texas Crutch method ensures juicy and flavorful ribs by creating a steamy environment during cooking. This process helps break down tough connective tissues, making the meat fall-off-the-bone tender. Additionally, it prevents the ribs from drying out during longer cooking sessions. Whether you’re preparing smoked ribs or grilled ribs, this technique guarantees a moist and flavorful outcome.
Foil vs. Butcher Paper: Which Wrapping Works Best for Barbecue Ribs?
Choosing between foil and butcher paper depends on the results you want to achieve.
- Foil for Juicier Ribs: Aluminum foil tightly seals the ribs, locking in moisture and creating a soft texture.
- Butcher Paper for Firmer Bark: Butcher paper allows some steam to escape, resulting in a firmer bark while still keeping the ribs tender.
Both options work well for different types of barbecue ribs, so choose based on personal preference or experiment to find your favorite.
Step-by-Step Guide: Wrapping Ribs for Perfect Tenderness
Follow these steps to master the Texas Crutch method for your party ribs recipe:
- Prepare the Wrapping Materials: Lay out a large sheet of foil or butcher paper on a clean surface.
- Add Flavor Enhancers: Before wrapping, place moisture-enhancing ingredients like butter, honey, or brown sugar directly onto the ribs.
- Wrap Tightly: Fold the foil or paper around the ribs, sealing the edges to prevent steam from escaping.
- Return to Heat: Place the wrapped ribs back in the smoker or oven to continue cooking for 1–2 hours.
How the Texas Crutch Elevates Smoked and Grilled Ribs
When preparing smoked ribs recipes, the Texas Crutch method ensures the smoky flavor remains intact while tenderizing the meat. Similarly, for grilled ribs, this technique helps overcome the drying effects of direct heat.
Key Benefits of the Texas Crutch:
- Cuts down cooking time while maintaining moisture.
- Enhances the tenderness and juiciness of the ribs.
- Infuses the meat with additional flavors from the added ingredients.
Moisture-Boosting Ingredients for Barbecue Ribs
To take your barbecue ribs recipe to the next level, consider adding these ingredients inside the wrap:
- Butter: Adds richness and enhances the natural flavors of the ribs.
- Brown Sugar: Caramelizes during cooking, providing a sweet, glossy finish.
- Honey: Creates a sticky texture and balances the smoky flavors.
- Apple Juice or Cider: Keeps the ribs moist while adding a subtle fruity undertone.
Finishing Wrapped Ribs for Party Perfection
Once you’ve unwrapped the ribs, you’ll notice the meat is tender and infused with flavor. To add a finishing touch:
- Glaze the Ribs: Brush on your favorite barbecue sauce or honey glaze.
- Caramelize the Bark: Return the ribs to the smoker or grill for 15–20 minutes, allowing the glaze to set and the bark to form.
The Texas Crutch technique makes ribs in any party ribs recipe incredibly tender, flavorful, and ready to impress your guests. Now, it’s time for the final touches to prepare these ribs for serving!
6 : Finishing Touches
The final steps in preparing your party ribs recipe are just as important as the earlier stages. This is where the ribs transform into a visual and culinary masterpiece. From unwrapping to glazing and caramelizing, every detail counts to create ribs that leave a lasting impression.
Unwrapping the Ribs
Once the ribs have completed the Texas Crutch stage, carefully remove them from the smoker. Use tongs or heatproof gloves to handle the hot wrap. Gently unwrap the foil or butcher paper over a tray to catch any juices that have pooled inside.
Pro Tip: Save the juices! These can be added to your glaze for an extra punch of flavor or used as a drizzle during serving.
Glazing the Ribs
A flavorful glaze is the finishing touch that elevates your ribs. The glaze not only adds shine but also enhances the smoky, savory, and sweet notes.
Simple Glaze Recipe:
- ½ cup barbecue sauce
- 2 tablespoons honey or maple syrup
- 1 tablespoon apple cider vinegar
Brush the glaze generously over both sides of the ribs. Make sure to coat every inch for an even, sticky finish.
Caramelizing for a Perfect Bark
To achieve a slightly crispy, caramelized bark, return the glazed ribs to the smoker or place them on a grill.
Steps for Caramelizing:
- Heat the smoker or grill to 275°F (135°C).
- Cook the ribs uncovered for 15–20 minutes, allowing the glaze to set and caramelize.
- Keep an eye on the ribs to avoid burning the glaze.
The result is a glossy, golden-brown finish with a subtle crunch that contrasts beautifully with the tender meat.
Resting the Ribs
Resting is a crucial yet often overlooked step. Once the ribs are done, let them sit for 10–15 minutes before slicing. Resting allows the juices to redistribute throughout the meat, ensuring every bite is moist and flavorful.
Why It Matters:
Skipping the resting stage can cause the juices to escape when slicing, leaving the ribs dry.
Slicing and Presenting the Ribs
To make serving easier and visually appealing, slice the ribs carefully:
- Place the ribs meat-side up on a sturdy cutting board.
- Use a sharp knife to cut between the bones for even portions.
- Arrange the slices on a platter in a fanned-out or stacked presentation.
Garnish with chopped parsley or a sprinkle of smoked paprika for an eye-catching finish. Your ribs are now ready to wow your guests!
7 : Serving Suggestions
No rib feast is complete without the perfect accompaniments. The right sides and beverages elevate your party ribs recipe into a full-fledged meal that satisfies every guest.

Ideal Side Dishes for Party Ribs
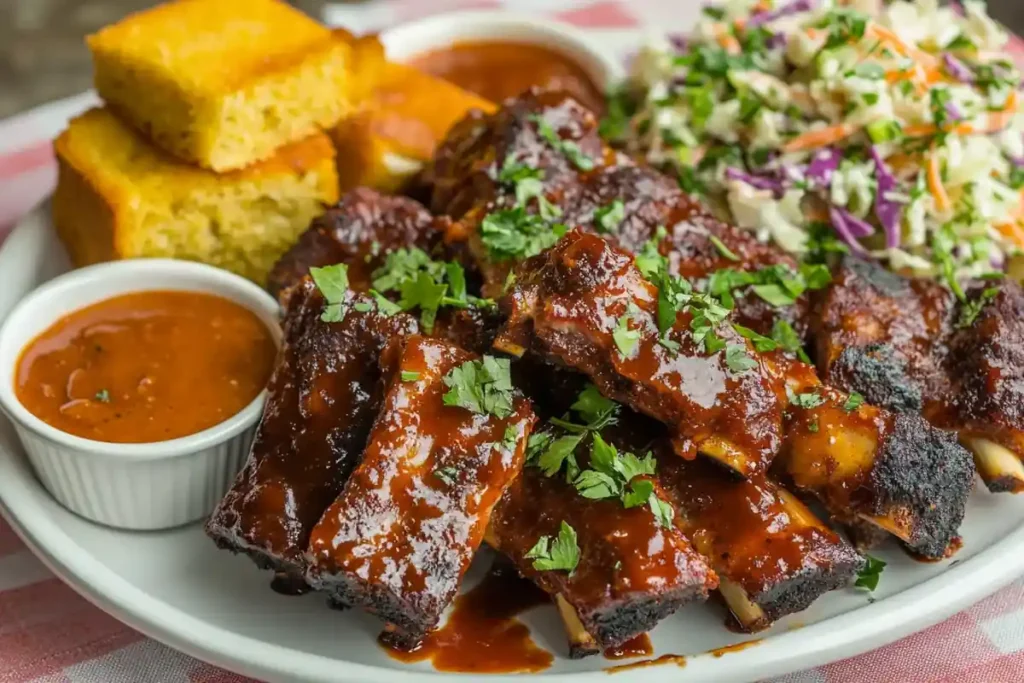
Pair your ribs with complementary sides to create a well-balanced and satisfying plate. To elevate your meal, consider these classic and creative options:
Coleslaw: The tangy crunch of coleslaw perfectly contrasts with the richness of the ribs, adding a refreshing and lively element to each bite.
Cornbread: Sweet and fluffy cornbread enhances the meal by providing a comforting texture that complements the smoky flavors of the ribs.
Grilled Vegetables: When you grill zucchini, bell peppers, and asparagus, they bring a smoky, slightly charred taste that pairs wonderfully with the ribs while keeping the dish light and nutritious.
Mac and Cheese: Creamy and cheesy mac and cheese never fails to please; it serves as a crowd-pleasing side that balances the smokiness of the ribs with indulgent, rich flavors.
Potato Salad: A cool, creamy potato salad not only offers a delightful contrast to the warm ribs but also enhances the overall dining experience with its smooth, tangy dressing.
By carefully choosing these sides, you can complement the bold flavors of your ribs and create a memorable, well-rounded meal for everyone at the table.
Beverage Pairings
Enhance your rib experience with refreshing drinks that complement the smoky, sweet flavors. Non-alcoholic options include:
- Iced Tea: Sweet or unsweetened tea provides a classic pairing.
- Lemonade: A tart and tangy contrast to the ribs’ richness.
- Sparkling Water with Citrus: A light, bubbly choice to cleanse the palate.
Creative Plating Tips
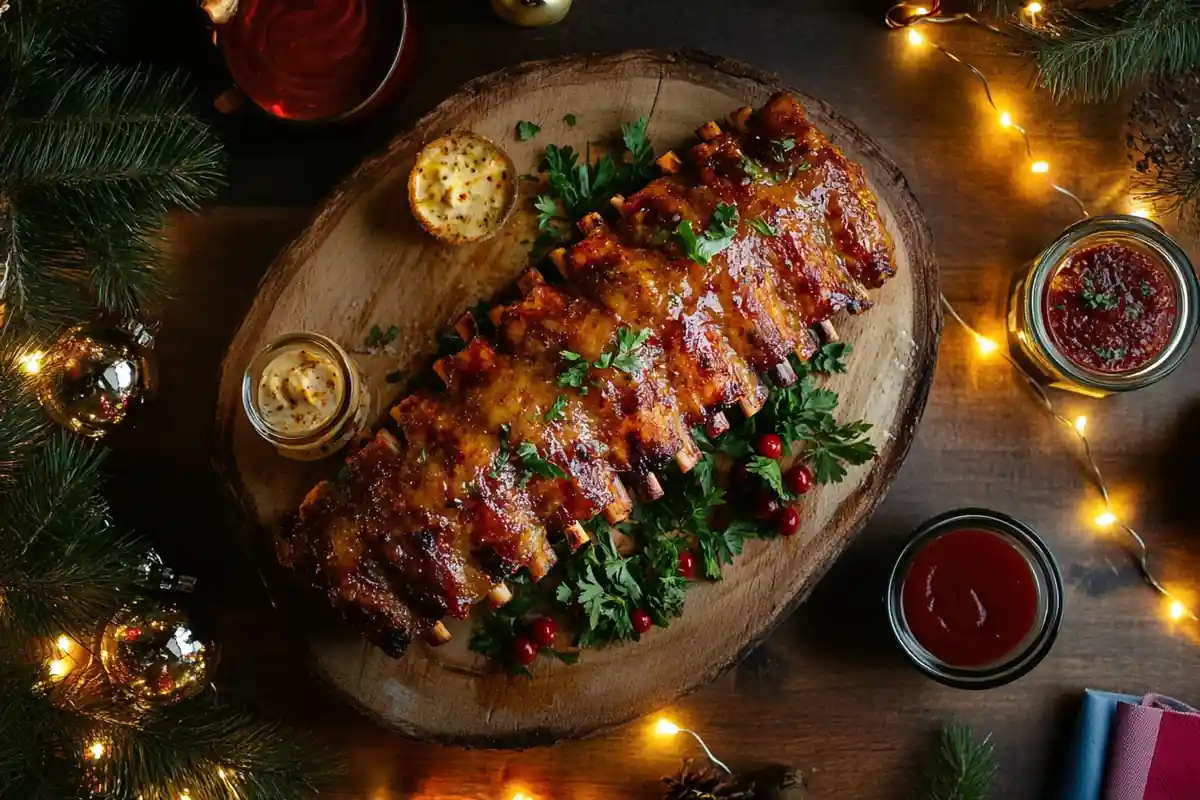
Presentation matters just as much as taste when serving your ribs. Here are some ways to impress your guests:
- Platter Layout: Arrange ribs in layers or fan them out for easy access.
- Garnishes: Use fresh herbs, thinly sliced green onions, or even edible flowers for a pop of color.
- Dipping Sauces: Serve a variety of sauces in small bowls, such as extra barbecue glaze or spicy mustard.
For an elevated touch, use rustic wooden boards or cast iron skillets as serving dishes. This adds a casual yet stylish vibe to your presentation.
With your party ribs recipe perfected and plated alongside mouthwatering sides, your meal is ready to steal the show. Guests will be raving not just about the taste but also the thoughtful presentation and accompaniments.
8 : Frequently Asked Questions
When it comes to perfecting a party ribs recipe, there’s no shortage of questions. Whether you’re new to cooking ribs or looking to refine your technique, these answers address the most common concerns and ensure your rib-cooking experience is a success.
What are the best cuts of ribs for smoking?
The best cuts for smoking include:
- Baby Back Ribs: Lean and tender, they cook relatively quickly and are ideal for those who prefer milder flavors.
- Spare Ribs: Larger and fattier, these are perfect for low-and-slow smoking as the fat renders into the meat for a rich, juicy result.
- St. Louis-Style Ribs: A trimmed version of spare ribs, offering a uniform shape that cooks evenly and is easier to handle.
For beginners, baby back ribs are a great starting point, while seasoned smokers often prefer the flavor-packed spare ribs.
Can I make ribs without a smoker?
Absolutely! While smoking adds a distinctive flavor, you can achieve delicious ribs using alternative methods:
- Oven-Baked Ribs: Preheat the oven to 300°F (150°C). Wrap seasoned ribs in foil and bake for 2–3 hours until tender, then broil with glaze for caramelization.
- Grilled Ribs: Use indirect heat by placing the ribs on the cooler side of the grill. Add soaked wood chips for a hint of smokiness.
- Slow Cooker Ribs: Layer ribs in a slow cooker with your favorite sauce and cook on low for 6–8 hours. Finish under a broiler to caramelize the sauce.
These methods are great alternatives when you don’t have a smoker or need a quicker option.
How do I achieve tender ribs without smoking?
Tenderness depends on low, slow cooking and proper preparation. Key tips include:
- Remove the Membrane: This step ensures the rub and heat penetrate the meat evenly.
- Cook Low and Slow: Whether in the oven or on the grill, keep the temperature around 225–250°F (107–121°C).
- Use Moisture: Wrap the ribs during cooking with butter, apple juice, or another liquid to create steam and soften the meat.
Resting the ribs after cooking also helps lock in juices for tender bites.
How long should ribs rest before serving?
Ribs should rest for at least 10–15 minutes after cooking. This allows the juices to redistribute throughout the meat, preventing dryness and enhancing flavor. Cover the ribs loosely with foil to keep them warm while resting.
What are some common mistakes to avoid when cooking ribs?
Avoid these pitfalls to ensure your ribs turn out perfect every time:
- Skipping the Membrane Removal: This can lead to chewy, tough ribs.
- Over-Smoking: Too much smoke can make ribs taste bitter.
- Cooking Too Fast: High heat can cause ribs to dry out or become tough.
- Not Resting: Slicing too soon causes juices to escape, leaving ribs less flavorful.
How do I store and reheat leftover ribs?
To store ribs, wrap them tightly in foil or place them in an airtight container and refrigerate for up to 3 days. For longer storage, freeze for up to 3 months.
To reheat:
- Preheat the oven to 250°F (120°C).
- Wrap ribs in foil with a splash of water or sauce to keep them moist.
- Heat for 20–30 minutes until warmed through.
Avoid microwaving ribs, as this can dry them out and make them rubbery.
With these answers, you’re well-equipped to tackle any challenges in your rib-cooking journey. Whether smoking, baking, or grilling, your party ribs recipe will always be a hit!
This concludes our ultimate guide to mastering party ribs recipe. For more tips and inspiration, don’t hesitate to revisit each section to refine your rib-making craft.

